MAKE: NO KNEAD BREAD
The smell of freshly baked bread is a real appetite stirrer but to be honest I’m not really a fan of making bread the traditional way. It’s not all the kneading, I quite enjoy that. It’s all the waiting around. I’m an impatient soul.
So when presented with this recipe some years ago now, I was keen to try it. Why? Because most of the waiting happens while I sleep or doing other things.
The recipe actually originates from Jim Lahey, owner of the Sullivan St Bakery in Soho New York. It’s actually credited with” igniting a worldwide home-baking revolution” when it was first reported by Mark Bittman in the New York Times in 2006.
The version I started with was an adaptation by Suzanne Gibb published in Table Magazine back in 2007. Suzanne has modified it further in The Thrifty Kitchen, a well used book in my kitchen. The recipe below is still largely true to its Jim Lahey origins with a little help from bread improver if you like and an option to use a wholemeal flour (I am a nutritionist after all). The main difference lies in the method. I have picked up tips along the way that make handling that wet dough a little easier.
I generally mix this bread up around 3-4pm on a Friday or Saturday afternoon This means it can be baked sometime on the morning of the following day. Timing is loose and the recipe quite forgiving. Give it a try and let me know how you go, or if you have your own version don’t be shy, share the link.
No-knead bread
Makes 1 loaf
- 3 cups (450g) plain all purpose flour OR 250g wholemeal and 200g white
- 1tsp bread improver (optional)
- ¼ tsp instant dry yeast
- 1tsp salt
- Flour, burghul, cornmeal or wheat bran (optional) to dust
Add dry ingredients to a large bowl and whisk to combine (this is an alternative to using a sieve which is handy when you use wholemeal flour as bran just doesn’t sieve). Add 1 ½ cups of tepid water and stir until well mixed.
Cover bowl with plastic wrap and then a tea towel and leave to sit out of the way of draughts at room temperature for 12-18 hours. A little less or more won’t greatly affect outcome. The surface should be covered with lots little bubbles.
Then, back to your dough, liberally flour a work surface (I use a plastic tray to contain the mess) and scrape the dough out on to it. The dough will be really sticky and look like goop. Avoid using your hands, you’ll regret it.
Using a scraper turn the edges in to form a flour coated dough ball. Do this three or four times but don’t over work it.
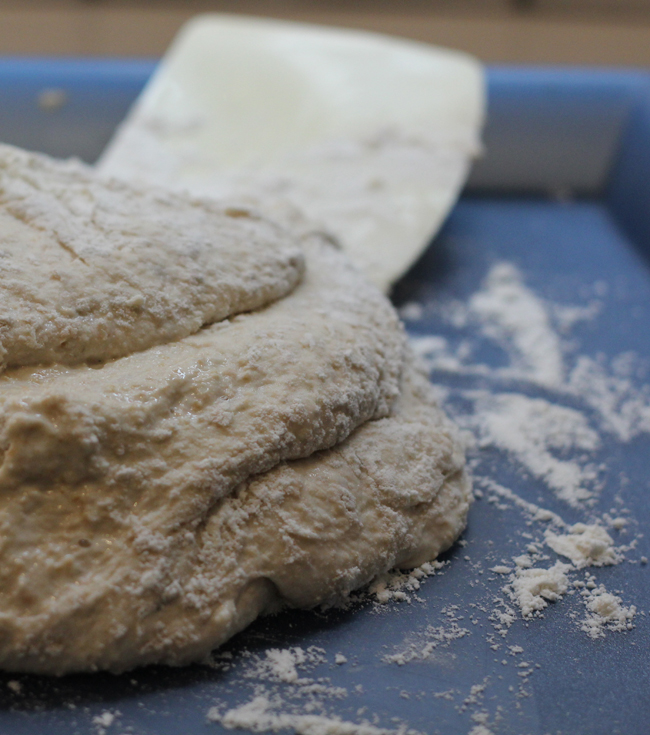
Using a scraper, work the dough gently into a floured ball
Transfer dough to a sheet of baking paper and place into a mixing bowl. Cover with plastic wrap for 30 min.
Note, Jim uses a tea towel sprinkled with flour or bran to wrap his dough in. If your dough is relatively dry this works fine however my dough always seems way too wet and I end up with a doughy cloth that is horrid to wash.
That’s why I use the baking paper. Baking paper is not used to stop the bread sticking in the pot but to make it easier to move the dough around.
While your dough is proving, Put the oven on to pre-heat to 240C or 220C fan forced and put your lidded baking pot in at the same time. This pot can be any oven-proof, lidded pot such as a Le Creuset, Glass Pyrex or Dutch oven. But it could also be a Pizza stone with stainless steel bowl to act as a lid, heat proof dish with aluminium foil etc. The aim is that it should be all nice and hot when the bread is ready to go in.
When 30 minutes is up and your pot is nice and hot, remove it from oven and carefully pick the dough up with the baking paper and place into the pot (take care I have had some beauty burns from this step). For a rustic look, slash the top with a sharp knife and sprinkle with a little flour, wheat bran or polenta and carefully replace the lid and return to the oven.
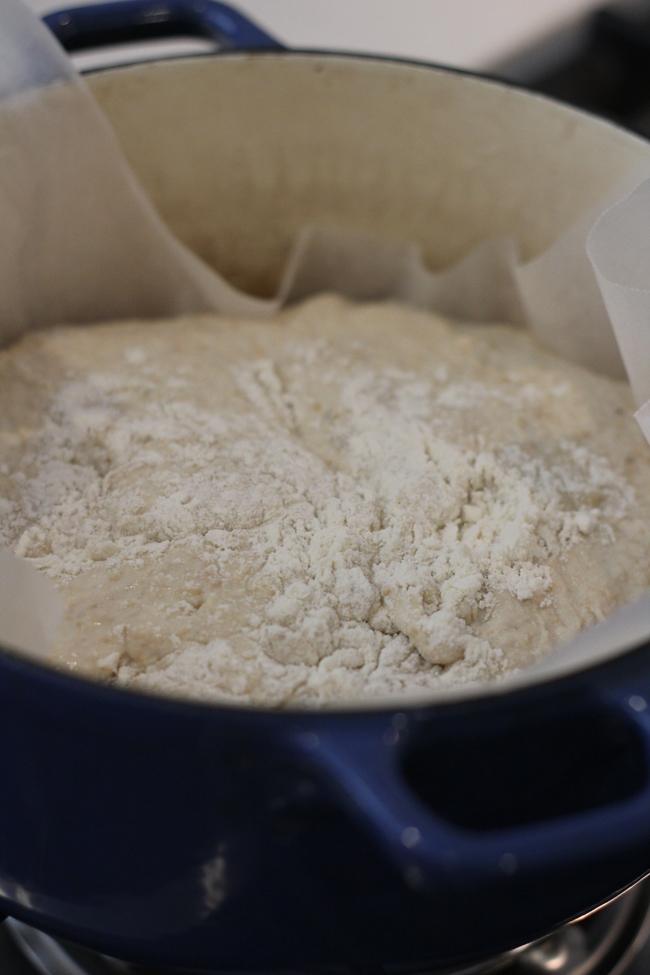
Add your dough to the hot pot and take care not to get burnt
Bake for 30min and then remove the lid. You should just start to see some colour to the loaf at this point.
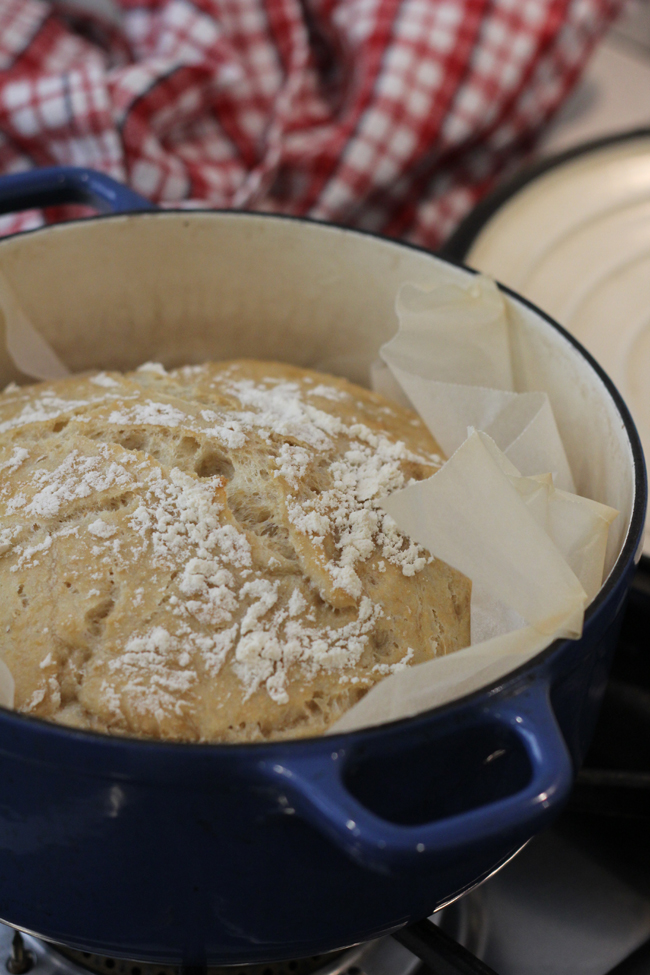
Return your pot to oven and bake uncovered for a further 15-20 min or until it’s cooked to your liking. Turn out onto a bread board or wire rack to cool or slice and eat warm – yum, yum!
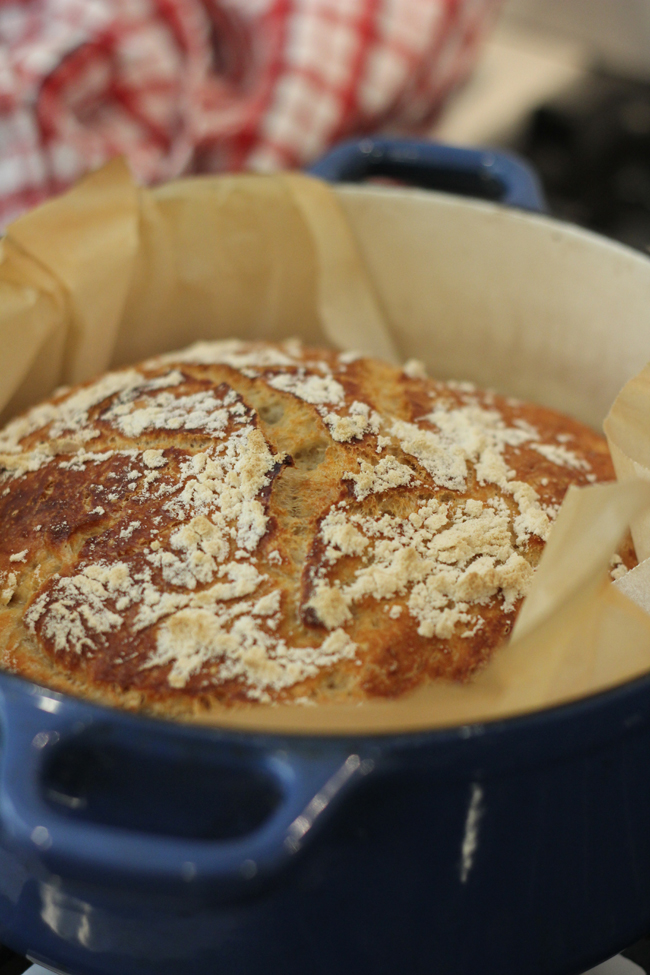
Fresh from the oven and I think it’s done
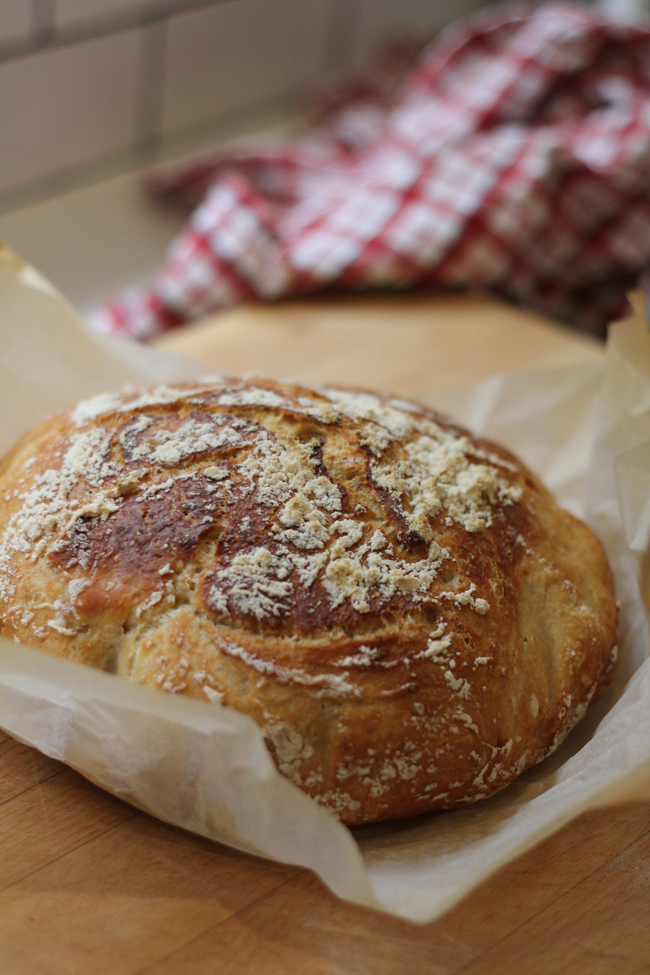
Ta da! A perfect crunchy cob loaf
GOOD STUFF TO KNOW:
It’s the steam created by the lid that helps produce the crisp crust.
For an even crisper loaf all over rather than just the top, remove from the pot and place on a wire rack for the last 10min of cooking.
For a shiny top brush with a little beaten egg.
Add seeds or grains to the mix for interest or try a white/rye flour combination (1/3 rye to 2/3 white flour).
If you’re keen to see what else you can do with a no knead dough check out what Janet from Utah does with it on her site Simply so Good. She has also spent more time photographing the method which you might find helpful.
And if you are interested in a faster no-knead bread, Mark Bittman (who seems a tad obsessed by this bread) talks to Jim Lahey about his quick version on YouTube. Hang out till the end to get Jim’s advice on the best variation for a quicker result.